The Spooky2 software now features an expansive database of 80,000+ programs. With a database capacity of 200 million programs, it also allows you to create your own programs and build custom protocols tailored to your specifc needs. This guide will explain how to create, edit, and manage your custom programs within the Spooky2 software.
How to Create a Custom Program
To create and save a custom program, you can use the Create Program function, located under Menu Bar>Files.
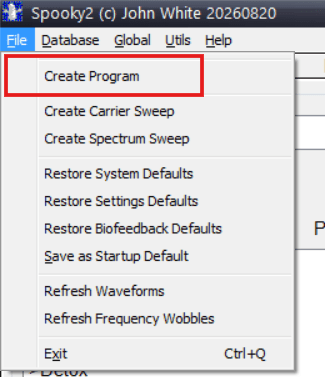
This will open the program creation window. For a basic program, you can simply enter a program name, the desired frequencies, and any additional notes. Note that each frequency in the set must be separated by a comma, and that no space is needed after the comma before the next frequency. The default dwell time for each frequency is 180 (in seconds).
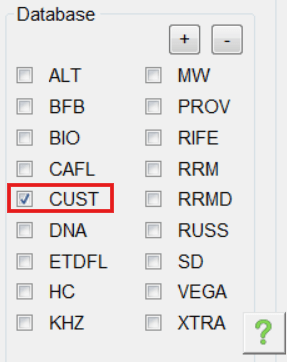
For example, if you want to create a test program with three frequencies—7.83 Hz, 174 Hz, and 963 Hz—enter 7.83,174,963 in the Frequencies section. Click the Save button in the top-right corner, and your custom program will be saved to your CUST database (custom.csv). You can always find it in the CUST collection under the Programs tab.
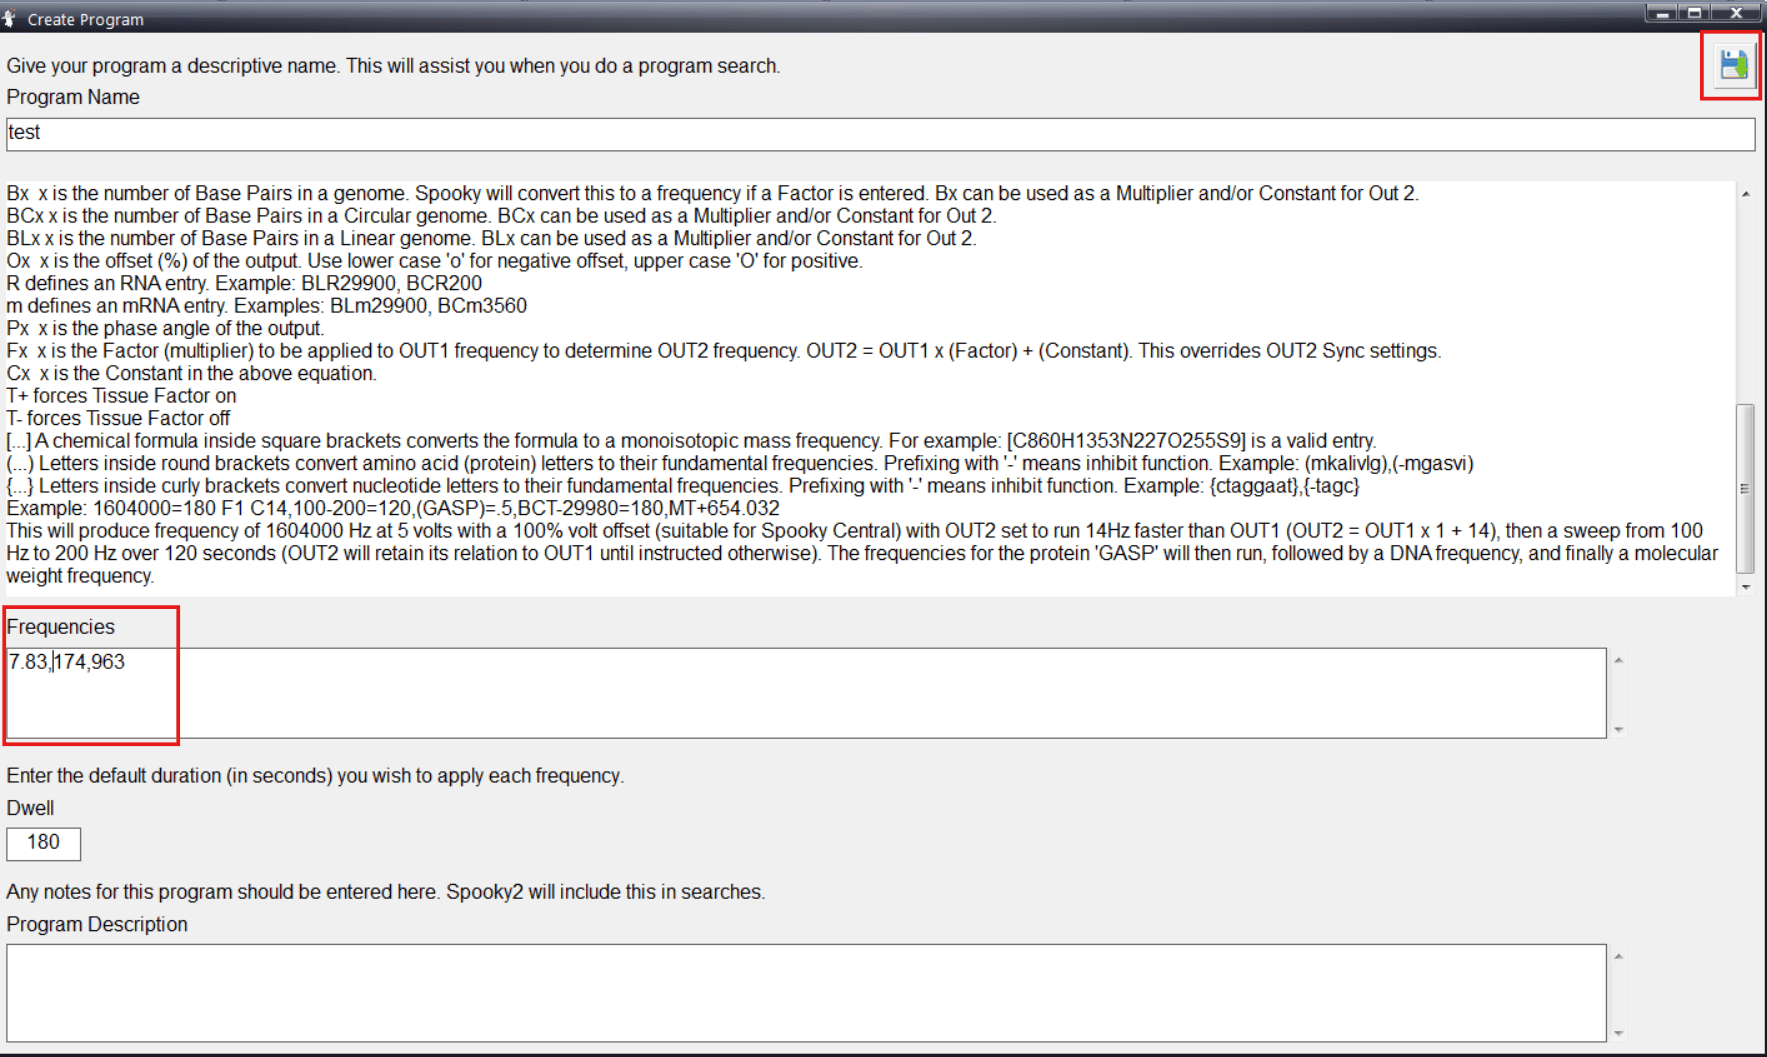
The commands listed below the Program Name textbox allow you to apply advanced configurations to individual frequencies. Below are two of the most commonly used commands:
- Dwell Time: You can specify a custom dwell time for any frequency in your set by entering an “=” followed by the desired dwell time in seconds. For example, if you want to run 7.83 Hz from the above program for 10 minutes (600 seconds) while keeping the default dwell time for the other frequencies, your frequency set should be: 7.83=600,174,963.
- Frequency Sweep: To create a frequency sweep, enter a frequency range such as 1000-10000. For an ascending sweep, enter the lower frequency first, followed by a hyphen (the sweep command), and then the higher frequency. For a descending sweep, simply reverse the order.
If you are an experienced Spooky2 user, you can further configure your custom program with more advanced commands so that it can run without applying a shell. For detailed explanations of these commands, please refer to pages 73–75 of the Spooky2 User’s Guide.
For general users, we recommend creating a basic custom program first and then applying an empty shell to run it. The video below provides a step-by-step demonstration of how to create and use a custom program in the Spooky2 software.
If you want to add a temporary set of frequencies to your selected programs, you can enter them directly into the textbox next to the search box under the Programs tab. The formatting rules and commands are the same as those used when creating a permanent custom program. After entering the frequencies, click the “+” button. The temporary frequency set will then appear in the Loaded Programs section at the bottom-left of the Programs panel.

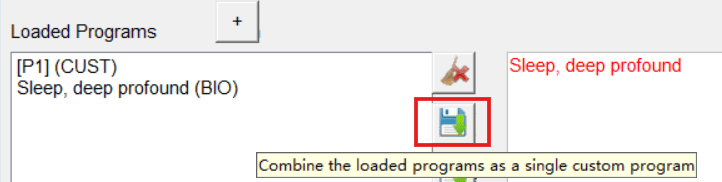
You can also merge this temporary frequency set with other selected programs into one single custom program. To do this, click the Save button next to the Loaded Programs box. This will open the Create Program window, where you can review and save the combined frequencies as a new custom program.
How to Edit A Custom Program
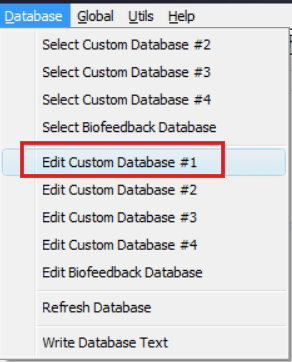
Once you create a custom program, it is automatically saved to Custom Database #1, located at: C:\Spooky2\Custom.csv. You can modify or delete your custom programs at any time by selecting “Edit Custom Database #1” from the menu bar.
In the CSVed panel, select the custom program entry you want to modify. Then click “Edit” at the bottom of the window to open the editing panel, or click “Delete” to remove the program.
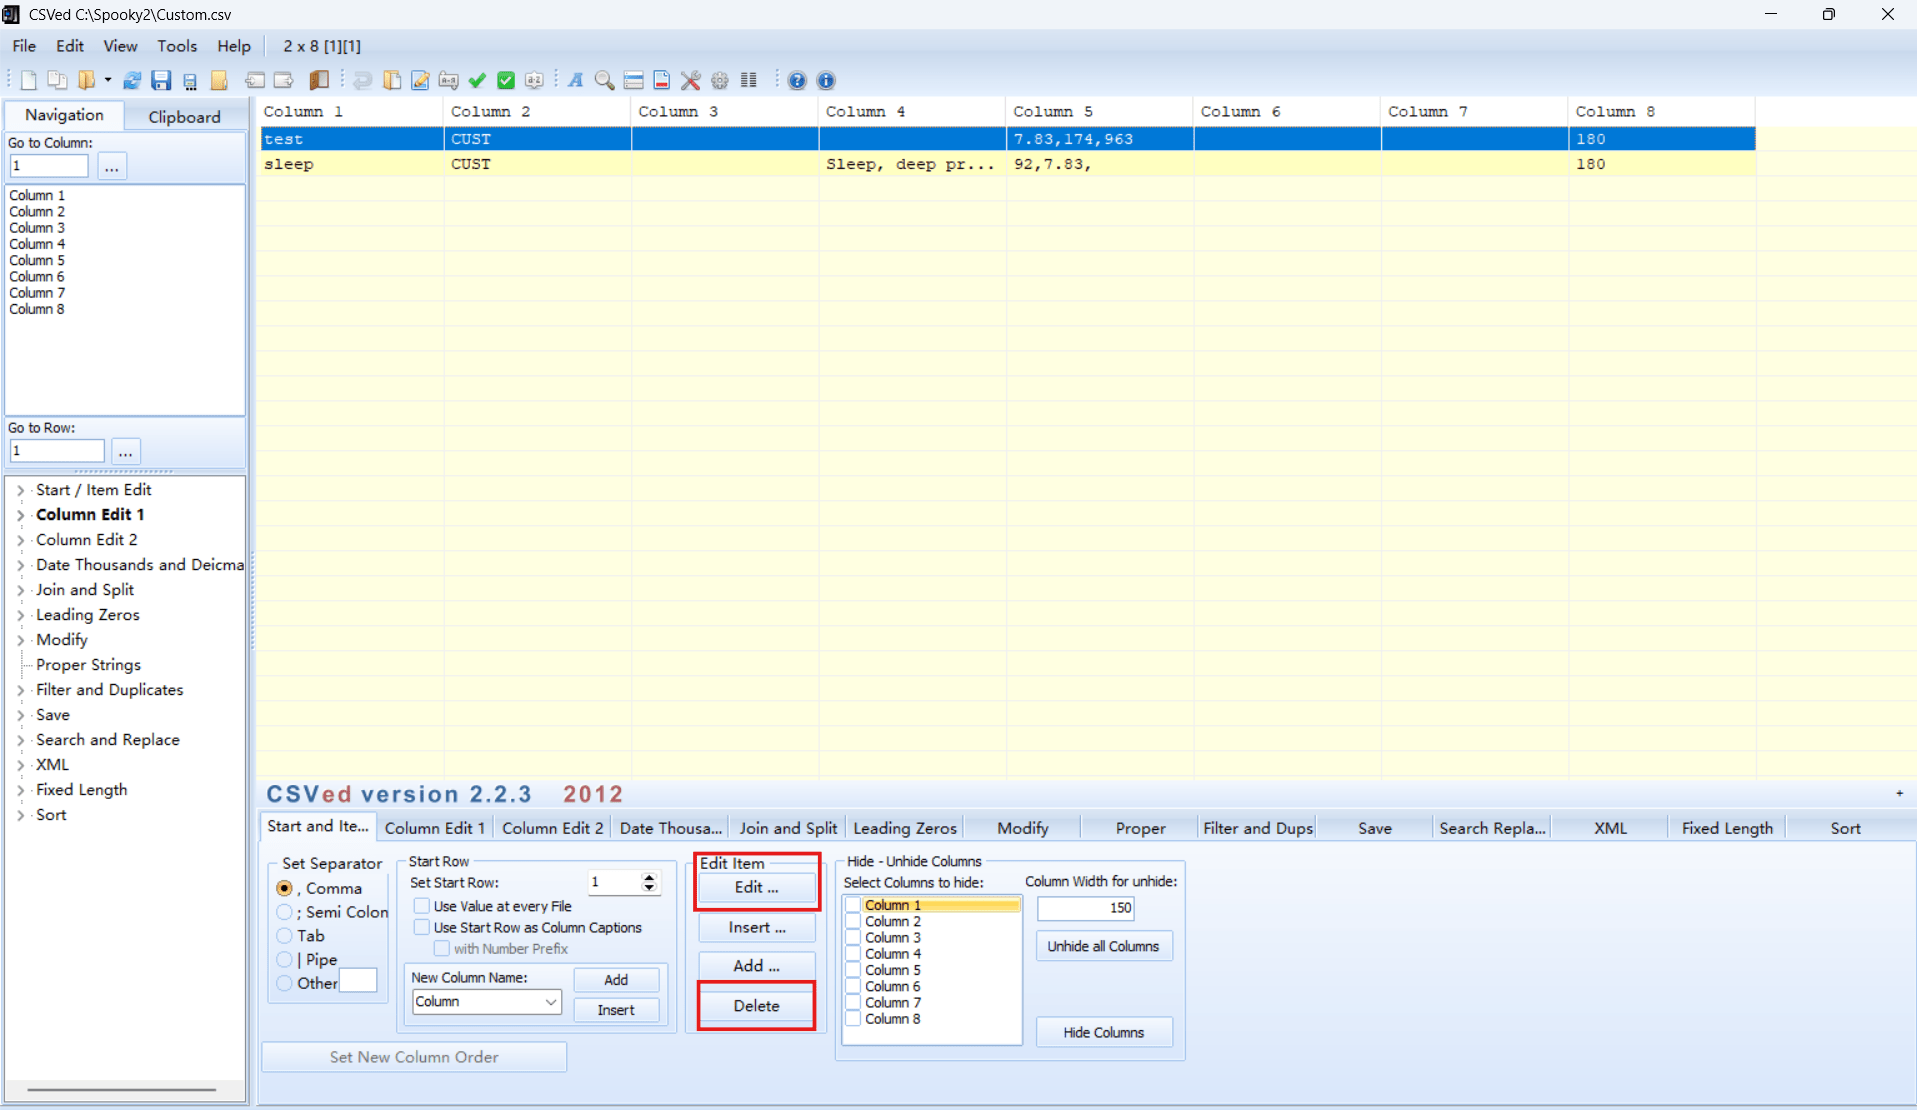
In the editing panel, Column 1 contains the program name, Column 4 contains the program notes, Column 5 contains the frequency list (including commands), and Column 8 contains the dwell time. After making your changes, click “Ready” to finish editing. Remember to save your changes when you exit the CSVed panel.
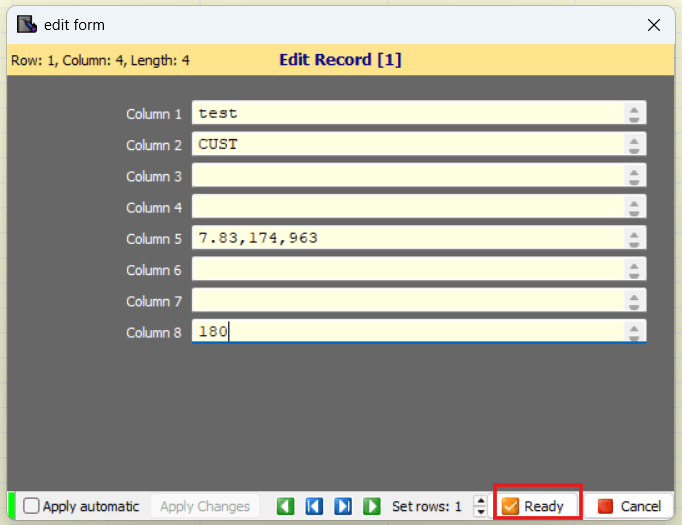
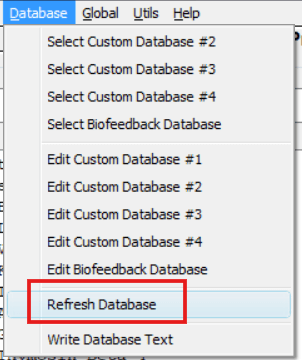
After saving your changes, click “Refresh Database” to update your custom database and ensure the latest edits are applied. The video below is a step-by-step demonstration of how to edit your custom programs.