


The Spooky2 system is a highly versatile system with a wide range of operating modes and accessories. If you are new to Spooky2 or setting up a new device, you may wonder whether your hardware is connected correctly and working as expected. In this guide, we’ll walk through how to test different Spooky2 hardware components and verify that your setup is functioning properly.
Testing Your Generators
If your generator is recognized successfully by the Spooky2 software, you should see it listed in the Generator Pane under the Control tab. On XM Pro generators, the USB icon on the display will turn white. For GX Pro generators, G1 and G2 will display their assigned port numbers.
If you want to make sure your generator is outputting signals correctly, you can use the Remote signal test to help verify its operation. (For step-by-step instructions, please check this post.) If the LED lights on your Spooky2 Remote blink as expected, your generator is outputting signals properly.
Testing Other Components
Remote and Boost
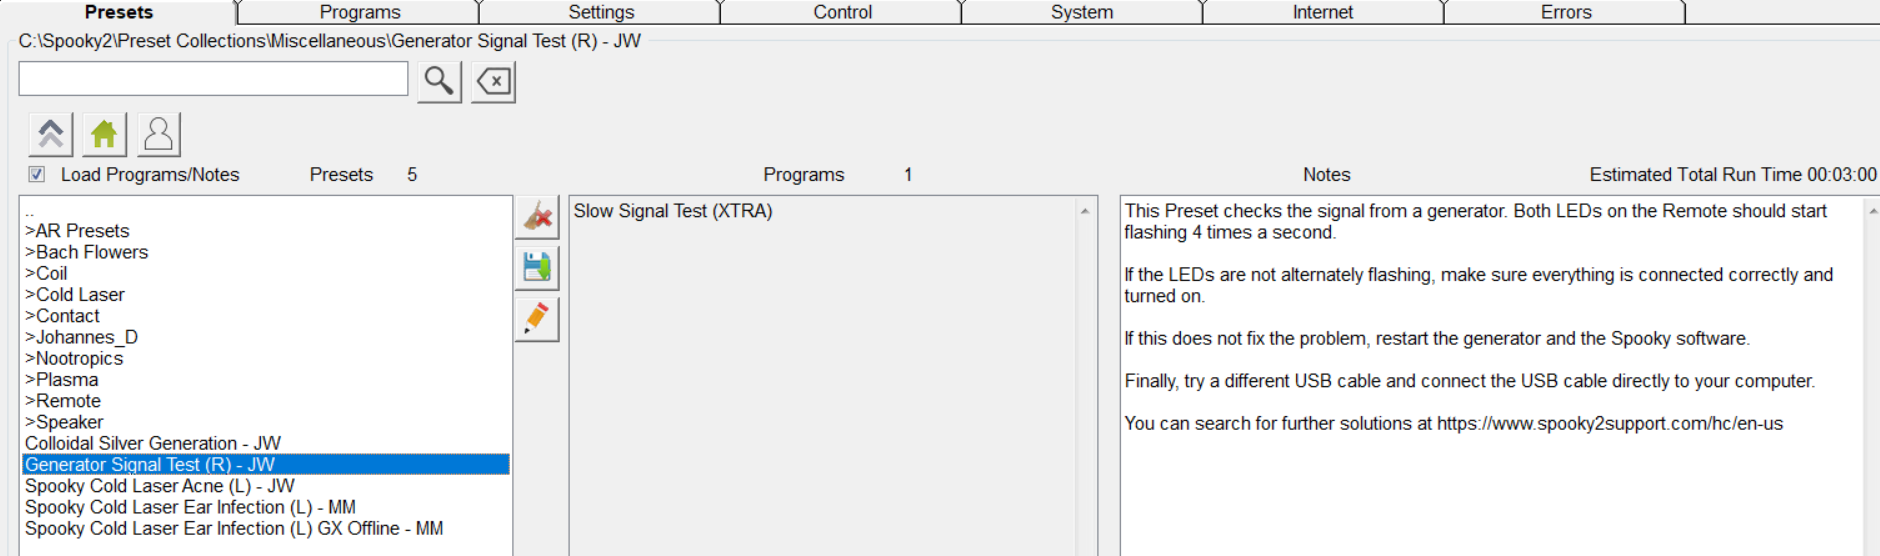
The Spooky2 software includes a simple preset for testing Remote signals (Presets>Miscellaneous> Generator Signal Test (R) – JW). For detailed instructions, please check this post. This preset uses a single frequency of 4 Hz. If both LEDs on the Remote flash approximately four times per second, your Remote is working correctly. The LED lights on the Spooky2 Boost should also flash at a similar rate during the test.
When you run a frequency program other than the signal test, you may notice that the LED lights on your Remote behave differently. This does not necessarily mean that your Remote is faulty or set up incorrectly. The LED behavior depends largely on four factors: frequency, waveform, offset, and amplitude. For a more detailed explanation, you can read this post.
Contact
Whether you feel any sensation when using Contact mode depends mainly on the program settings and individual sensitivity. In general, users are more likely to notice a sensation when running frequencies below 10,000 Hz. With higher-frequency programs or lower-voltage settings, you may not feel any sensation at all.
If you are unsure whether your Contact mode setup is working, you can run a low-frequency program (below 10,000 Hz) with a higher-amplitude setting (20V) using the High Power port. Many users may feel the current, which can help confirm that the Contact mode is operating.
Central Plasma
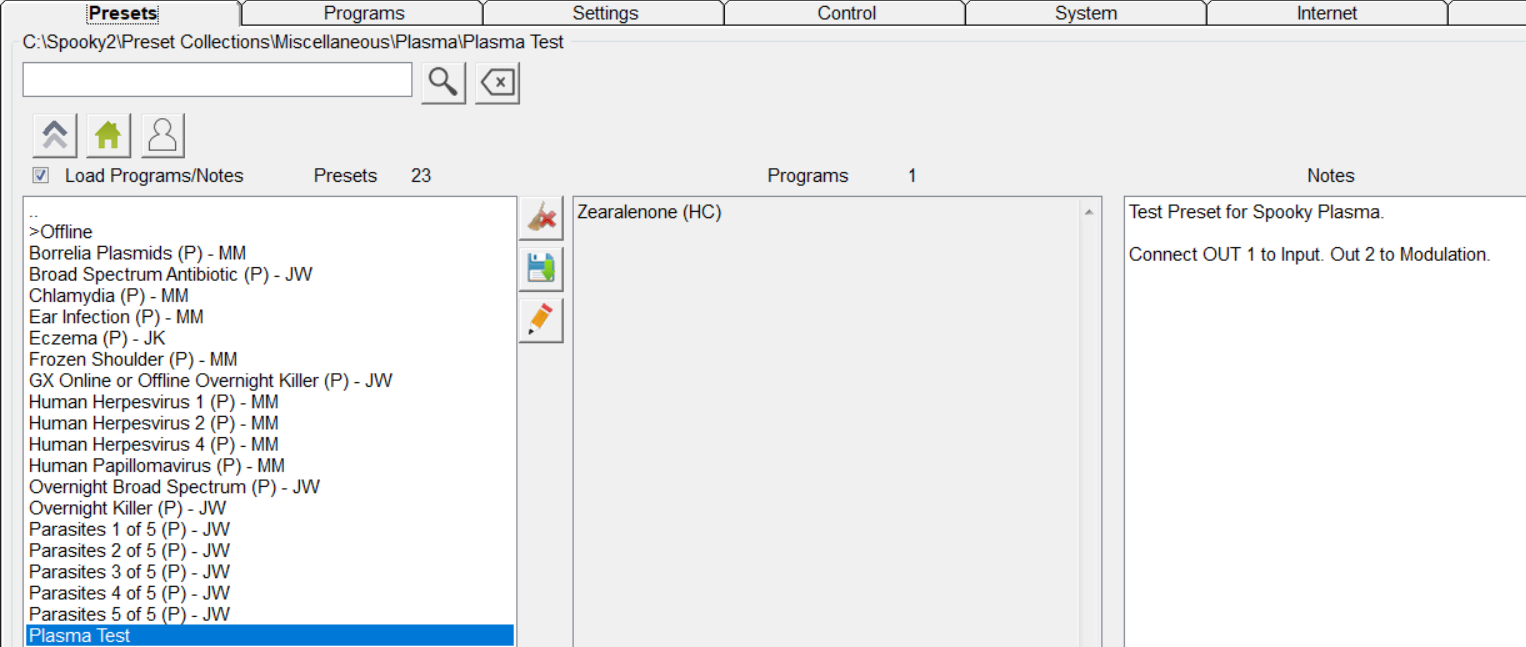
You can test your Plasma setup with the Plasma Test preset (Presets>Miscellaneous>Plasma>Plasma Test). Make sure that your generator and laptop are placed away from the Central box and Plasma bulb during the test.
When you run the Plasma Test preset, the Plasma bulb should flash. The input indicator light on the Central box should also flash, and you may hear beeping sounds coming from the Central box.
Scalar
You should tune your Spooky2 Scalar with every use via the tuning knob on the Transmitter box. After tuning, turn on the Receiver Light in the Receiver box. The light will turn on when a scalar field is present.
However, during a Scalar Digitizer biofeedback scan or a Rife scalar session, it is normal for the Receiver Light to be bright, dim, or even completely off. Some power may be lost through the Scalar Digitizer or generator, and the link cable can become more sensitive to earthing.
The Receiver Light only needs to be illuminated; it does not need to reach maximum brightness. Remember to turn off the Receiver Light during scalar sessions, as it takes up energy from the scalar field.
PEMF Coil
It is normal for the LED lights on the Spooky2 Boost to appear dim or off when it is connected to a PEMF coil. You may also not feel any noticeable sensation during PEMF sessions.
To verify that your PEMF coil is functioning, you can run a frequency around 1,000 Hz using the Coil shell preset. Place a Spooky2 Remote next to the coil, and you may hear a buzzing sound, which helps confirm that the coil is functioning as expected.

You forgot to add how to check PEMF coil. Here is what works for me:
1. Set GX on Signal Test Preset.
2. Connect PEMF Coil to High Power output of Spooky Boost.
3. Place a Compass on top of the coil.
4. If compass needle is fluctuating back and forth this shows that signal is getting to coil and magnetic field is being generated
Please note: Any signal faster than the test signal of 4Hz may not show any deflection of the compass needle as the compass is not able to respond quickly enough to the changing magnetic field. Any signal slower than the test signal should show a greater deflection of the compass needle.
Thanks for your supplement!
You forgot to add how to check PEMF coil. Here is what works for me:
1. Set GX on Signal Test Preset.
2. Connect PEMF Coil to High Power output of Spooky Boost.
3. Place a Compass on top of the coil.
4. If compass needle is fluctuating back and forth this shows that signal is getting to coil and magnetic field is being generated
Please note: Any signal faster than the test signal of 4Hz may not show any deflection of the compass needle as the compass is not able to respond quickly enough. Any signal slower than the test signal should show a greater deflection of the compass needle.
Thanks for explanations….very concise/clear.
Hi, thanks for your support and affirmation. Hope this blog can be helpful for you:)
Lol, is this a joke?
Isn’t there another step?
Like after selecting – how to you actually make it run?
Because this did nothing.
Hi, Joe. Really so sorry to bring you this trouble. See details from this video: https://www.youtube.com/watch?v=uB8Nc02d3Ds